


1) Scope & mandatory inputs
This procedure applies to PEB steel structures including: foundations/anchor bolts, primary frames (columns – rafters), bracing systems, purlins, roof/wall sheeting, and accessories (gutters, downpipes, trims, ridge caps, doors, etc.).
Minimum inputs to build “to standard”:
- Approved construction drawings (shop drawings): general arrangement, grids, foundation layout, connection details, bolt schedule.
- Method statement & lifting plan, temporary bracing plan, site safety zoning/traffic control.
- Material/member documentation: member IDs, certificates (CO/CQ if required), bolt grades, paint system, sheeting specs.
- Certified/checked lifting gears: cranes, slings, shackles, turnbuckles, etc. inspected before each shift.
2) Site preparation: grids – levels – laydown – safety
2.1 Verify grids & levels
- Confirm benchmark coordinates and elevation; verify grid deviations against drawings.
- Mark gridlines clearly; set safe access routes, lifting exclusion zones, and member laydown areas.
2.2 Safety readiness before erection
INDUSVINA references (recommended before site execution): Pillar 1/5 — Risk identification (JSA) • Pillar 2/5 — Procedure & Permit to Work (PTW)
3) Anchor bolt verification before frame erection
Anchor bolts are the “origin point” of the frame system. Grid/level errors force field adjustments, create restraint stresses, and break erection tolerances.
- Check bolt centerlines against grids; verify bolt spacing matches base plate pattern.
- Check top-of-foundation elevation / base leveling; surface flatness and grout condition (if applicable).
- Check threads, projection length, bending; clean threads before installation.
4) Primary frame erection: columns – rafters in a stable sequence
4.1 Frame erection principles
- Erect by bay; install temporary bracing immediately to stabilize before unhooking the crane.
- Start with “reference frames” (end frames / braced bays) to establish alignment control.
- Do not release the load until columns/rafters are temporarily secured and stable.
4.2 Column erection
- Set columns in position, install nuts/washers for temporary holding; use shims as designed (if applicable).
- Install temporary guys/turnbuckles to keep columns plumb during erection.
Gallery Version 2 — Column erection & roof/wall cladding (site illustration)
Desktop: 2 columns • Mobile: 1 column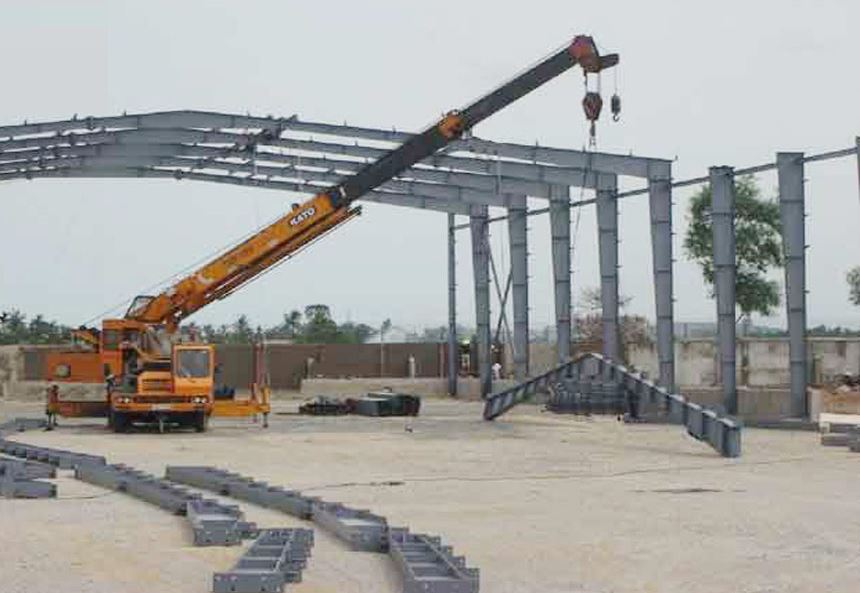

4.3 Rafter installation & frame connections
- Install rafters using safe lifting sequence; snug-tight bolts per “right hole – right grade”.
- Complete bay 1 → lock temporary stability → move to the next bay.
5) Bracing – purlins – stability system: the “backbone” against sway
Many erection incidents are not caused by the crane, but by insufficient stability when loads are released under wind gusts or eccentric forces.
- Install roof/wall bracing (X-bracing, rod bracing) per drawings: correct locations, anchor points, and tensioning.
- Install roof/wall purlins systematically from reference frames outward; ensure adequate connections before sheeting.
- Install purlin bridging and secondary bracing to prevent twist and ensure stability during construction.
6) Geometry alignment & bolting in stages
6.1 Alignment
- Check column plumbness, rafter straightness/deflection, bay spacing, and longitudinal line.
- Adjust with turnbuckles/temporary bracing; do not force-bend members.
- Lock reference bays first, then propagate checks to the rest.
6.2 Bolting in stages
- Stage 1: snug-tight to hold geometry and continue erection.
- Stage 2: after alignment acceptance, tighten to torque/spec (use torque wrench if required).
- Apply inspection marking (paint mark) for QA/QC and handover.
| Control point | Target | Evidence |
|---|---|---|
| Plumbness / frame geometry | Within project tolerances | Survey records, inspection logs |
| Bolted connections | Correct grade – quantity – torque | Bolting checklist, torque/marking record |
| Stability bracing | Fully connected before task transition | Internal bay-by-bay acceptance |
7) Roof sheeting – wall cladding – leak-prevention accessories
7.1 Sheeting principles
- Start from the most stable area; ensure fall protection (lifelines, harness, anchorage, safety nets).
- Control lap direction; use correct fastener type/spacing/washer; avoid repeated re-drilling.
7.2 Leak-prevention items (often underestimated)
- Install ridge caps, fascia/trim, gutters, downpipes per details.
- Use specified sealants/tapes; treat penetrations (pipes, vents, skylights) properly.
8) Touch-up painting – corrosion protection – structural finishing
This section focuses on items that directly affect durability and structural safety:
- Touch-up damaged coating as per paint system requirements.
- Check corrosion-prone zones (column bases, water-trap areas, gutter interfaces).
- Finish base plates/covers, protective guards, and safety signage for hazardous zones.
Note: civil works (paving, road markings, landscaping) may be part of the project scope, but are not the core of the PEB frame erection procedure.
9) QA/QC & inspection: bay-by-bay and by discipline
Effective inspection is not “inspect only at the end” — it is staged acceptance to lock quality:
- Acceptance of anchor bolts / base plates.
- Acceptance of frames by bay (columns – rafters – bracing – purlins).
- Acceptance of bolting, geometry, and stability bracing.
- Acceptance of roof/wall cladding and leak-prevention works.
Related field management framework: 4 core tasks in project execution.
10) Standards & applicability (Vietnam + international) — mapped to controls
Standards vary by project requirements. Below is a practical grouping and how they align with key control points.
| Standard group | Examples | Where it matters most |
|---|---|---|
| Vietnam standards (TCVN) | TCVN for steel structures, bolting, construction & acceptance (per design dossier) | Construction control, tolerances, site inspection, staged acceptance records. |
| USA | AISC (design/erection), ASTM (materials), ANSI | Material/bolt grades, connection principles, inspection requirements. |
| Europe | EN / Eurocode, related ISO | Tolerances, quality management system, staged inspection requirements. |
| Japan | JIS | Material and inspection methods when specified by the client/project. |
| China | GB | Compatibility control among drawings, materials, and acceptance when GB is specified. |
| Russia/EAEU | GOST | Applicable when design/materials are per GOST; control per contract/spec. |
11) Daily checklist for PM/Site Manager
- Before shift: wind/weather check; lifting gear inspection; PTW/JSA; define exclusion zones.
- During shift: erect bay-by-bay; brace before unhooking; no “erect then fix”.
- End of shift: lock temporary stability; mark tightened bolts; photo records; update logs & checklists.
For standardized safety control: JSA + PTW is the recommended “dual gate” to implement first.
12) Conclusion (Chief Engineer)
A standard procedure does not slow down progress — it reduces rework, prevents incidents, reduces acceptance disputes, and protects the contractor’s reputation. For PEB, “to standard” means getting it right from foundations/anchors to bolting – leak prevention – inspection records.

5504_328x235.jpg)


